Friday 26 December 2014

SDF-1 Table pt. 1


Happy Boxing Day.  With a few days off, its time to get back into some RRT.

With my Mars Base Sara base complete, my mind drifts to a new project and I am strangely drawn to the challenge of building a table representing a portion of the SDF-1.


]
As with my Mars Base table, my work begins with research and there are a few episodes that make great references for designing a SDF-1 table top, specifically:

  • Sweet Sixteen - Episode 8
  • Battle Cry - Episode 16
  • Farewell Big Brother - Episode 18
  • Battle Hymn - Episode 22
  • Reckless - Episode 23
Based on viewing the above episodes, I have made a few observations


Colour:  The hull of the SDF-1 varies from light gray, to dark gray, to blue.  Ground markings on the hull are white, yellow and red.


Terrain:  Although the surface looks flat, there are numerous obstacles to fight around.  Hatches lead to a multitiered interior city where a great deal of the fighting occurred.


Goals:


With the possibility of the battle breaching the exterior of the ship and entering the streets of Macross city, well the temptation is just too great.
  • Exterior of the ships hull
    • Turrets, and exterior buildings to block LOS
  • Access to the interior of the ship where Macross City is located
    • Streets, blocks for buildings
    • possible multiple levels
  • Modular set up to give both exterior and interior options and transition between the two.


The challenge is going to be fitting it on a 4'x6' table without it looking cramped.


So with that, my next phase awaits. 

Sunday 21 December 2014

The 12th Day of Khyron - 'Pick up Lt. Hayes.' Battle Report

Well we finally made it.  Today is the 12th Day of Khyron and we have successfully brought you 12 RRT articles in 12 days.

For your final gift, we have for you a battle report based on Scenario 3 of the Battle for Mars campaign.  You can read the scenario details here: Scenario 3 with the exception of the additional Space Battlefield rules (pg 82).  No rolls with impact this game and everything does not gain flight due to gravity.

The Forces:

For this battle, I selected 2 Attrition Squadrons each with a Quel-Gulnau recovery pod and a Recon Squadron with a third Quel-Gulnau.  My plan was to get Lt. Hayes into the hands of a Quel-Gulnau as soon as possible, then keep her away from the UEDF using the pod's flight and 9 MDC.  Only one problem, I noticed later that the support option card states 'Add 1 Quel-Gulnau to your Regult Core Force Card squadron that contains a Glaug.'  So as I read this, Attrition squadrons can not take the Quel-Gulnau.  My mistake but we will go with it. 240 points total BTW.


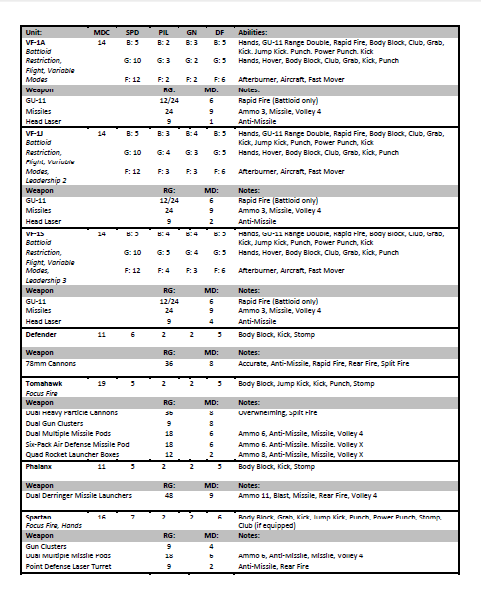
For the UEDF, I opted for two Valkyrie squadrons with nose lasers, a VF-1S, Fokker and Hunter for 240 points.  The fast moving valkyries can search the loot markers quickly, then one squadron will cover the other as it plays cat an mouse until the end of turn 6.

Setup:


The forces deployed as seen in the above pic.  The Zentraedi won initiative and began to alternate placement of the loot markers (black circles).

Turn 1:

 The Zentraedi right flank Attrition squadron leaped forward searching the loot marker between the mecha bays finding nothing.  Roy Fokker flew on top of a building where a loot marker was situated.  Finding nothing he unleashing a volley of missiles into a clutch of pods destroying 4 of them.  The Zentraedi Recon Squadron then pushed forward with the Glaug leaping on top of Riber barracks, finding nothing at the loot marker, then firing on Fokker inflicting 10 damage while the Quel-Regult's Advanced Reconnaissance Suite began delivering targeting data to the surrounding pods.  A remaining pod from the Recon squadron searching another loot marker to no avail.  Rick and Vermilion Squadron advanced in Guardian mode to behind the Riber barracks, ready to engage the left flank attrition squadron the following turn.  Finally the remaining Brownie squadron advanced just shy of the two remaining loot markers and fired on the right flank attrition squadron.

Fokker unleashes hell.

Turn 2:

Things really began to heat up as the UEDF took the initiative.  Two of Vermillions vertiechs launched missile volleys at the Glaug which managed to shoot all the missiles down with his short range missile tubes, but took 6 damage from GU-11 fire.   Rick and the other veritech damaged a score of pods from the attrition squadron.


The right flank attrition squadron managed to close the gap further damaging two of the brownies opposing it.  Roy Fokker then decimated the Glaug with an 4 missile hits.


The remainder of the Recon squadron fired on Fokker damaging him further.  The Brownies, having discovered Lt. Hayes, destroy the right flank attrition sqaudron down to 1 remaining pod.


While Vermilion squadron got surrounded by the left flanking Regult swarm, resulting in a brownie going up in flames to concentrated particle cannon fire.


Turn 3:

The Zentraedi attempt to fight back by winning initiative and blasting Roy Fokker is heavily damaged from accurate dice rolls from 10 pods, despite successful 7 dodge rolls. 


Vermillion Squadron fires back at the recon squad killing 3 more with missile fire but fails to protect Roy from the remaining pods in the recon squadron.  Running low on CP points and bad dodge rolls, Roy's veritech was destroyed by particle cannon fire.  No pineapple salad for you!


The Brownie squadron finished off the remaining Regult and Quel-Gulnau clearing their left flank.

Turn 4:


The UEDF win initiative.  Rick and his remaining squadron call no joy, switch to fighter mode, boost and afterburner 36" away from the pod swarm.  The Pods pursue but 3 fall to Brownie GU-11 fire.
As the UEDF begin to play cat and mouse, the clock ticks down on the Zentraedi.  The remaining attrition squadron advances but fails to get within range and LOS of the fleeing valkyries.

Turn 5:

The UEDF keep the initiative and take cover from advancing Zentraedi fire.  Two of the Brownies pick off two pods from the recon squadron while taking a few hits in return.


Vermilion took cover awaiting the final turn.

Turn 6:

The cat and mouse game was coming to a close.  The Zentraedi took the initiative back but it was too little too late.  The remaining attrition squadron could not close the gap on the brownies guarding Lisa, but did manage to further damage two veritechs.


Rick and his squadron flew up onto the roof and blew away 3 more pods, while another brownie destroyed a fourth.


With Lisa safe, the remaining valkyries took off to rendezvous with the SDF-1 as the base exploded beneath them.  Victory UEDF.


Observations:


  • In retrospect, the Quel-Gulnau were not as effective as I hoped, at least not when Lisa was found by the UEDF first.
  • Two heavily armed Attrition squadrons with Glaugs and artillery pods would have been a better choice.
  • Finding the prized object in a Recovery Scenario first means everything.  It is so much harder to recover the prize once the enemy has it.
  • The Recovery Scenario would be a totally different story for the UEDF without valkyries.  Fast movers win the day. 
  • I did not use the Roll with Impact rules this game and it sped things up quite a bit.
  • The Quel-Regult's Advanced Reconnaissance Suite, combined with Close formation and crossfire bonuses make Regult swarms very deadly (1 GN +3 to Strike).  It believe this is the secret to winning with Zentraedi Regults.
  • You can kill Fokker if he gets separated from a squadron and overwhelmed with fire.
  • Pods just can't catch Valkyries.  When the Queadluun-Rau arrive in wave 2, things will be different.

Well that's it until next week.  I hope you have a great holiday with your family and friends.   Play lots of RRT and keep your paint brush wet.


Saturday 20 December 2014

12 Days of Khyron - Day 11 Quick Reference Sheets


We have a special present for you today.  Below are links to my drop box account containing two files.  Both are sized for 8 1/2" x 11" paper.

The first is a one page, single sided quick reference sheet.  All the rules simplified on one page.

https://dl.dropboxusercontent.com/u/15577379/RRT%20Quick%20Reference.pdf

The second is the condensed mecha stats for the units in Wave 1.  The file is 2 pages, one for the UEDF, the other for the Zentraedi.  (note the UEDF sheet does not contain the VF-1R...sorry)

https://dl.dropboxusercontent.com/u/15577379/RRT%20Unit%20Reference.pdf


Simply print off 2 copies of the Quick Reference sheet, then one of each faction on the back.  Laminate them and you are set for a one page, double sided reference document that will serve you until Wave 2 is release.  Don't ask me what I will do then.


Now scramble all fighters and defend the SDF-1!


P.S. - If you see a mistake in the files, let me know and I will correct it.

P.P.S. - Unit reference updated to version 1.1 - Dec 20 8:43am EST

Friday 19 December 2014

10th Day of Khyron: Battle for Mars Campaign pt. 3

Welcome to the 3rd and final scenario for the Battle for Mars Base Sara.  First let me apologize that I missed some of the end scenario information for part 2.  Check it out again here:  Scenario 2


Scenario: 'Pick up Lt. Hayes.'

Khyron's forces have advanced deep onto Mars Base Sara and are closing in on the SDF-1.  Fortunately for the Earth defenders, Lt. Commander Lisa Hayes has set the base's reflex furnace to detonate.  The resulting explosion should not only knock out the gravity mines which keep the SDF-1 from taking off, but also destroy the remainder of Khyrons 7th Mechanized Division.  Unfortunately for the Zentraedi, they have no idea of the impending explosion.

6mm Lisa Hayes made from Z scale railroad people

But there is one problem, Commander Hayes is trapped in the room of her lost love Karl Riber, and can't make it back to the SDF-1 on her own.  Captain Gloval has dispatched Skull Squadron to rescue her.  If Lisa can be captured by the Zentraedi, she could provide much needed intelligence about the capabilities of the SDF-1.  Can Sergeant Rick Hunter find Lisa in time?  The clock is now ticking.

  Scenario Details:

  • Recovery
    • Prized Object: Lt. Commander Hayes
    • UEDF Restrictons:
      • Valkyrie Core Squadrons only
      • Valkyries including VF-S1s may be chosen for support.
      • Max, Myria or Ben Dixon may not be selected
      • Rick Hunter must be chosen as a character
    • Zentradi Restrictions:
      • Only Khyron, Grell, or Pirion-Galarr may be chosen as characters
      • Attack, Recon, Attrition or Artillery Core Squadrons only
      • Only Recon, Regult, Glaug and Artillery squads for support
  • Head to Head Deployment
  • Battlefield:  The entire battlefield should contain buildings from Base Sara.  (see Mars Base Sara Build)
  • End Game:   At the end of Turn 6, the base's reactor will detonate.  The side in possession of Lisa Hayes at that time will be declared the winner and be awarded 15 CVPs.  If Lisa is not found, then no points are awarded to either side and my beautiful Lisa is lost forever. :(


Campaign Results:
At this time you should total up the Campaign Victory Points awarded during the campaign.  The side with the highest number of points wins (See results below).

Victory - Khryon:  The Zentraedi have managed to inflict crippling losses on the SDF-1 preventing them from resupplying at Mars Base Sara.  The next attack on their space fortress will be their last.

Victory - SDF-1:  The crew has managed to resupply and avoid heavy casualties.  In doing so an entire division of enemy pods has been destroyed.

Tie:  Despite heavy losses on both sides, Khryon's division and the crew of the SDF-1 have survived to fight another day.


'I hate to lose a fight!'

Thursday 18 December 2014

12 Days of Khyron - Day 9 The Pod Swarm

Today I am going to showcase my 450 points of Zentraedi assembled and painted from the Showdown level pledge that I received from Palladium's kickstarter.  It took me 3 weeks to paint (along side my 450 points of UEDF) during which I watched the entire Robotech Macross saga about 3 times.


The army totals at:
  • 42 tactical pods
  • 6 light artillery
  • 2 heavy artillery pods
  • 2 Quel-Regult recon pods
  • 2 glaugs

A typical 450 point army:
  • Attrition Squadron (70 pts)
    • Light Artillery Support Squad (25 pts)

  • Attrition Squadron (70 pts)
    • Light Artillery Support Squad (25 pts)
 

  • Attack Squadron (80 pts)
    • Heavy Artillery Support Squad (40 pts)
    • Quel-Regult Recon Pod (15 pts)


  • Attack Squadron (80 pts)
    • Light Artillery Support Squad (25 pts)
    • Quel-Regult Recon Pod (15 pts)


That leaves 5 points for a character like Grell.  Drop a Quel-Regult and I can add Khyron for 10 points.


Pod Swarm Tactics:

So how do I plan to use my army?  Well there are a few things that a Pod Swarm has going for it.
  1. Close Formation:  Keeping your pods within 2" of each other will first give you a +1 bonus to strike at ranged combat if the mecha's gunnery attribute is less than the total number of mecha in the close formation.  This is particularly good for Regults with their pathetic 1 Gunnery, but also for Light Artillery Pods firing missile volleys.  Secondly, when mecha in a close formation are attacked, they can shield each other allowing you to split the damage between the mecha hit and another single mecha in the formation.  Mecha can only shield another mecha once per turn.  Burying your artillery pods in a swarm of Regults will keep them alive.  The down side is that mecha with blast weapons like the Phalanx and Monster can tear apart close formations.
  2. Quel-Regult Recon Pods: The Advanced Reconnaissance Suite will give all friendly mecha within 12" of the Quel-Regult a +1 to strike at a cost of 2 command points.  This is a no-brainer folks.  Combined with a +1 Close Formation bonus and suddenly your pods are becoming very accurate.  When your Quel-Regult gets within 24" of the enemy, switch to the Electronic Attack Suite for 1 command point and one enemy mecha within 24" of the recon pod will suffer a -1 penalty to strike at ranged combat.  Position these pods in a way that multiple squadrons can benefit from them.
  3. Zentraedi Armada:  When Regult pods are destroyed within 8" and line of site of a Glaug from the same squadron, they can be set aside until the beginning of the next turn, when they can be brought back into action at a cost of 1 command point per squadron with a Glaug that lost Regults from it's squadron (that's a mouth full, read the Zentraedi Armada faction card for further details).
  4. Artillery Pods:  Your light and heavy artillery pods can one shot most UEDF mecha.  Keep them alive and have them benefit Close Formation and from the Quel-Regult's Advanced Reconnaissance Suite.  Do it right and they will have a +4 (2 GN + 1 CF, +1 ARS) to their dice rolls to hit with multiple missiles. 
  5. Grell:  Khryon's second in command allows you to recycle destroyed pods that die while not in line of sight to the Glaug that Grell is piloting, so stick him in one of your Glaugs if you have 5 points to spare.
  6. Pirion-Galarr:  For 20 points a squadron that Pirion is a part of can automatically boost their speed once that turn without paying any command points or making piloting rolls allowing his squadron to move 15" per turn for free (5" SPD + Leap 5" + 5" boost).  How is that useful you ask?  It allows you to close the gap faster on nasty Phalanx and Monsters with their terrible blast weapons and allows you to get targets in crossfires faster.  Ya Pirion is pricey, but worth it if used correctly and against specific targets.
  7. Khyron:  And finally there is Lord Khryon himself who comes with a +1 PIL (which help when he dodges) and the Backstabber ability.  If you are running low on command points, Khyron can start blasting away at his own troops within 8" and gain +3 command points.  Regults destroyed this way can not return as reinforcements, but the extra command points could come in useful if you need a cp to dodge or roll with impact.  I feel it is most useful when you need to fire off a few more weapon systems to finish off that pesky Tomahawk squadron.  Khryon is only 10 points and has his uses, but at a price.


Until tomorrow, keep your protoculture matrix online!

Wednesday 17 December 2014

12 Days of Khyron - Day 8 Take it to the Max!

Welcome to the 8th Day of Khyron!  Yesterday we talked about Miriya in her VF-1J, so today we will take a look at her dashing husband and SDF-1 ace Max Sterling.
 
Max began his military career as a corporal serving under Rick Hunter in Vermilion Squadron.  Along side his companion Ben Dixon, Max quickly established himself as one of the best fighter pilots aboard the SDF-1 scoring an impressive number of enemy kills
.

The boy in blue was promoted to Lieutenant shortly after the SDF-1 returned to earth, and got his own VF-1J after his marriage to Miriya.  I can only imagine that the matching paint pattern was Miriya's idea, I mean come on Max... give Miriya her purse back and grow a set!


  In gaming terms, Max will cost you 10 pts and comes with a +1 GN and the Prescient skill which allows Max to re-roll all of his Dodge rolls that fail (no single roll can be re-rolled more than once).  If Max is 4" or less from his fem-fatal Miriya Sterling, he gains her Aggressive trait allowing Max to re-roll all his Strike rolls (no single roll can be re-rolled more than once).


 Max's VF-1J in 3 modes


The original Mr. and Mrs. Smith

Tuesday 16 December 2014

12 Days of Khyron - Day 7 Viva Miriya!


  Today we look at painting the sexiest green haired fighter pilot in the galaxy.  Formally known as Miriya Parina, she's a Zentraedi ace with a near fatal attraction to UEDF pilot Max Sterling.  They fell in love, married and produced a half-breed baby named Dana that who's very presence brought down an entire Robotech factory.


  At 10 pts she is a capable fighter with the Aggressive ability to re-roll all her strikes (only once per strike), she really shines when paired up with her blue haired husband Max.  When 4" or less from Max, she benefits from True Love and gains the Prescient ability which allows her to re-roll all of her dodge rolls (no single roll can be re-rolled more than once).  I can't wait to see how much damage these two will be able to dish out piloting super veritechs.


  Miriya's VF-1J paint scheme can be found at the bottom of pg 96 of the RRT rule book, but unfortunately, it is missing a few points.  Specifically the white stripe and arrow that is found under the arms as seen below.


I painted my Miriya using my usual methods of white primer, basic colours, clear coat, then pin washing the recessed lines using black ink.


Next I'll begin work on Max in his VF-1J.  Pics to come later during the 12 days of Khyron.